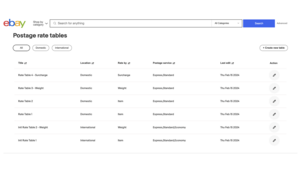
Create your own rate tables

Once completed, you will need to attach your rate table to your listings.

Attaching your rate table to a listing
Rate tables can be attached to your listings in the following ways:
Option 1 - Listing flow
- In the Shipping section, select ‘Edit all options’.
- Select ‘Shipping cost type’ as ‘Flat shipping’.
- Open ‘Domestic’ settings.
- Add the rate table you created from the dropdown menu to your listing.
- Select a default shipping option on the listing page. (This setting will be used for any buyers that fall out of the regions specified in the rate table. We recommend keeping this calculated shipping so that buyers can contact you.)
Option 2 - Business Policies
- Go to business policies
- Select the postage policy which reflects the rate table you have created
- Check the box “Apply domestic postage rate tables” underneath ‘Postage rate tables’.
- Select your rate table from the dropdown list. It will appear under the name you labeled your rate table as.
- Click ‘Save’ for the rate table to apply to this postage policy and all listings within it.

Option 3 - Using the API
You can find out more about using delivery rate tables through the API here .
There are two ways to add a postage rate table through the API:
- Add postage rate tables at the listing level. Find out more
- Add postage rate tables with business policies. Find out more

Manage your rate tables
You can view all your domestic and international rate tables in one place via Account Settings → Shipping Preferences → Edit under Use postage rate tables. To edit any of your current rate tables, simply click the button under the Action column of the rate table.

Learn more about postage rate tables
Head to the pain postage rate tables page to learn about tips, exclusions, and FAQs


